Pyramid Info
Pyramid Info

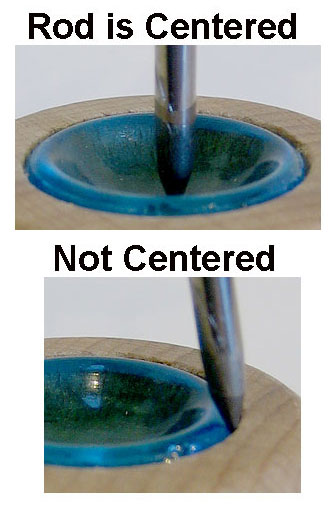
Contents *How do the Pyramids come? *What if my Pyramid isn't turning? *Directions for Use and Assembly of Pyramids. *Safety Tips How do the Pyramids come? Our pyramids are mostly pre assembled. The fan blades (also called fan-assembly, paddles, blades) are separate from the pyramid. Some fan blades come as one unit (fan-assembly) and this unit is just placed on top of the pyramid rod. For the pyramids that have separate fan blades, just insert the fan blades into the hub, and adjust them so they are at a 30 degree angle, then place the hub on top of the pyramid rod. What if my Pyramid isn't turning? First: Make sure the center rod is sitting centered on the glass cup (bearing). Many times it looks like it is sitting centered, but it may be off centered between the glass cup and the wood around it, making turning difficult.
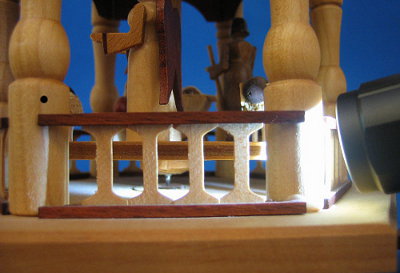
Using a flashlight, inspect under the lowest floor, look to see that the rod is indeed centered on the glass bearing.
Second: Check the angle of the fan blades, they need to be at 30 degrees. So start out with the blades level to the floor, then turn them up to 30 degrees. Many times the blades are set to 60 degrees not 30 degrees and at that angle they may not turn the pyramid.
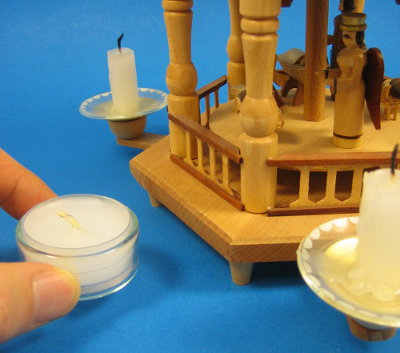
Third: Drafty Room: An "open layout" or large room will have air moving in it. Even though it doesn't feel drafty to you, it may be. Realize that the heat from the candles gets dispersed easily if room air movement is present. If your pyramid is not turning due to drafts, then you can move the pyramid to a corner of the room or you can add an additional candles - this means placing a tealight candle (one that is a glass container) near the pyramid to help give more heat. Directions for Use and Assembly of Pyramids 1. Carefully unpack pyramid and accessories.
2. Gently lift the central pyramid rod a small amount, and remove the cardboard under the bottom floor. Then carefully place the rod (axle) on the glass bearing which is under the bottom floor.
3. Place the paddlewheel assembly on the top point of the pyramid rod (axle).
For multiple level pyramids: Do steps 1 & 2 - then: 4. Put together the paddlewheel (put paddles at about a 30 degree angle) and place finished piece on the point of the pyramid axle.
5. Insert candleholders into the holes in the base made for that purpose. ** Put NO pressure on the rod while it is sitting on the glass bearing! ** Safety Tips
Use only pyramid candles (not too tall!).
The pyramid must stand firmly on a level horizontal surface and be protected from any drafts in order to function properly.
Never leave the pyramid burning unattended especially around young children!
Should the glass bearing become scratched or cracked , it is usually possible to replace it. See our parts dept for a replacement Do not burn candles in the mini pyramids (under 6-7 inches in height). They are there for decorative purposes only.
If you have any questions please do not hesitate to contact us. |


